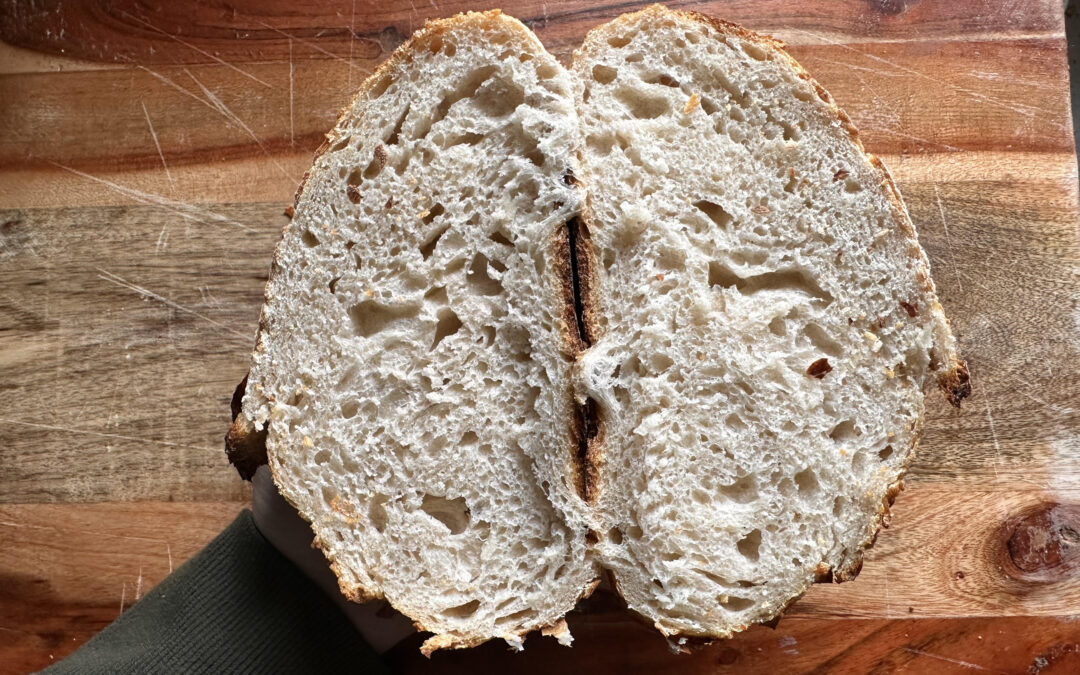
Sourdough Loaf Recipe
As a busy mom of three, I’m always looking for ways to elevate everyday meals without adding too much extra time to my day. Sourdough has always been a favorite in our household, but I wanted to take my usual loaf to the next level—both in flavor and texture. After some experimenting (and a few happy accidents), I’m excited to share my fancy sourdough loaf recipe with you!
What makes this recipe special? It’s all about balance. The addition of a touch of honey and olive oil gives the bread a subtle richness that’s balanced perfectly by the tang of the sourdough. For extra depth, I included a bit of cracked rye flour, and if you’re feeling adventurous, a handful of toasted seeds adds a satisfying crunch. It’s the kind of loaf that brings a sense of warmth and comfort to your kitchen, whether it’s for a cozy breakfast, an afternoon snack, or the perfect side to a homemade dinner.
One of my favorite parts of this recipe is the slow fermentation process—nothing beats the smell of freshly baked bread in the morning after an overnight proof. And trust me, the wait is worth it. The crumb is soft, the crust is perfectly golden, and the flavor? Simply divine.
This recipe has become a new family favorite in our home, and I hope it will be in yours too. Enjoy the process, take your time, and savor the moments that come with making something so simple yet so special.
Ingredients
- 310 g filtered water (for a cleaner taste)
- 200 g bubbly active sourdough starter (ensure it’s at its peak for best fermentation)
- 15 g sea salt (for a deeper flavor)
- 500 g high-quality bread flour (consider using a blend of bread flour and whole wheat for added complexity)
Optional Additions (for a twist of flavor):
- 10 g honey or malt syrup (for a subtle sweetness that enhances the flavor)
- 10 g olive oil (for a softer crumb and richer texture)
- 1 tablespoon freshly ground herbs (rosemary or thyme for a fragrant aroma)
- 50 g cracked rye flour (for added depth and a slightly tangy flavor)
- 2 tablespoons freshly toasted sesame seeds or sunflower seeds (add before baking for texture)
Instructions
- Autolyse:
- In a large bowl, combine the filtered water and bubbly starter. Let it sit for a few minutes to activate the starter.
- Add the flour and salt (and any optional add-ins like honey or olive oil) to the mixture and stir until combined. Let the dough rest for 30 minutes to allow the flour to fully hydrate. This process helps improve gluten development and flavor.
- Mixing:
- After the autolyse, transfer the dough to your stand mixer and mix on low speed for 10 minutes, allowing the dough to become smooth and elastic.
- Bulk Fermentation:
- Transfer the dough to a greased bulk fermentation bowl. Cover it and place it in a warm spot (like the microwave).
- Perform 3 sets of stretch and folds at 30-minute intervals during the first 2 hours of bulk fermentation. This strengthens the dough without overworking it. Allow the dough to continue fermenting for a total of 5 hours, or until it has doubled in size.
- Shaping:
- Once the dough has fermented, gently remove it from the bowl and shape it into your desired loaf (either one large loaf or two mini loaves).
- If you’re adding seeds or herbs, sprinkle them on the surface of the dough at this stage, gently folding them into the dough.
- Place the shaped dough into proofing baskets, cover, and refrigerate overnight for a slow, cold proofing (12–16 hours).
- Baking:
- Preheat your oven to 500°F (260°C) with a Dutch oven or baking stone inside for at least 30 minutes to get it hot.
- Once preheated, carefully place the dough into the hot pot or on the stone. Cover with a lid (or another pot if using a baking stone) and bake for 20 minutes, using steam to help the loaf rise beautifully.
- After 20 minutes, remove the lid and lower the oven temperature to 450°F (230°C). Bake for an additional 20–25 minutes, or until the crust is golden brown and the loaf sounds hollow when tapped on the bottom.
- Cooling:
- Allow the bread to cool on a wire rack for at least 1 hour before slicing, as this allows the crumb to set and the flavors to fully develop.
Extra Fancy Tip:
- Before baking, you can score the dough with a decorative pattern using a sharp razor blade or lame. This creates a beautiful visual effect and allows the loaf to expand perfectly in the oven.
Enjoy your elevated sourdough loaf! It’s simple but full of character with the added twists of flavor and texture.
