
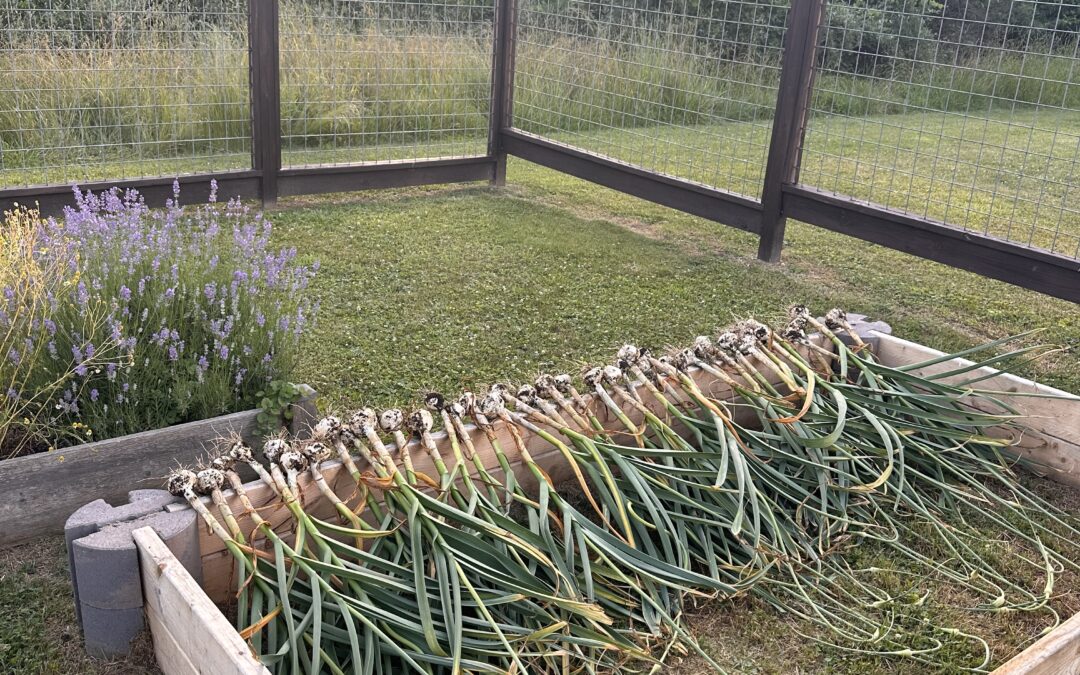
Growing Garlic
One of the most utilized produce items I use is Garlic. Almost every recipe I make uses it, it can be used to make tinctures, can be dried for a longer shelf life, can be a pest control around your garden, infused in olive oil to give as a gift, or frozen in ice cube trays for quick use. The opportunities are endless when it comes to this herb.
Every year I have increased the amount I plant for a bigger and bigger harvest. It is one of the easiest herbs to plant and has yet to have given me a bad return on investment. The first year I planted garlic, I ordered a bag of Heirloom Music Garlic. The package had three large heads and I was able to harvest about 20 new heads of garlic the following summer. That’s a lot of garlic for a simple back yard gardener! As you can probably guess, the following year I added another additional 25 cloves to the garden, and since then have increased my total harvest to 100 heads of garlic!
Here are some questions that you need to ask yourself if you are ready to add this herb to your garden:
- What type of garlic do you want to plant?
Hardneck Garlic– This type of garlic thrives in colder climates. It produces a flavorful, curly stem called a Scape in the early summer and has larger easy to peel cloves.
Softneck Garlic– This variety love mild climates. They produce more cloves per bulb, store longer and can be braided.
- When will I plant and harvest?
Planting window- Can you plant in mid-to-late autumn (usually October or November)? Garlic needs to be planted before the first frost and undergo a cold dormancy to stimulate the bulbs to divide into individual cloves.
Patience- Are you comfortable leaving that garden space occupied for 8 to 9 months until summer harvest? Garlic is usually harvested during the summer when the leaves start dying back. This means they will occupy their space and you will have to wait until
you harvest to plant anything else where they are planted.
- Does my planting location get full sun?
Garlic absolutely loves sunshine. If you have one of those spots in your yard that seems to bake all day long, that’s probably where your garlic wants to live. While it’ll tolerate a little shade, don’t expect those big, beautiful bulbs if it isn’t getting enough sunlight.
- How good is my soil drainage?
Standing Water- is the location you chose to plant somewhere that water puddles after a heavy rain? If so, building a raised garden bed will be your best bet to planting garlic in that area.
Rot risk- Garlic will rot easily in soggy, compact clay soil. This is another reason you may consider building raised beds for your garlic patch.
- How much garlic do I actually want?
Yield calculation- Every clove of garlic you plant will grow a single garlic bulb the following year.
Spacing- Do you have enough space to plant the bulbs 4-6 inches apart? Planting garlic too close together forces the plants to compete for resources, which will negatively impact your harvest. This can lead to smaller bulbs, nutrient deficient plant, water stress, stun ted leaves, fungal disease, and pest outbreaks.
- Where are you sourcing your garlic?
Sourcing- Make sure you are buying your garlic from a disease-free seed nursery or farm. I always recommend buying seed garlic from a reputable nursery instead of grabbing bulbs from the grocery store. Seed garlic is grown specifically for planting, while grocery store garlic is often treated so it won’t sprout. Starting with healthy seed garlic gives you a much better chance of a successful harvest.
Now let’s talk planting!
Once you determine what variety you are going to plant and the location of you planting site, planting is a breeze! Let’s get started!
Step 1:
Break apart your garlic bulb seed. Be sure to keep the tunics (the thin papery covering) in tact.
Step 2:
Dig a trench 3-4 inches deep (planting in rows will help with weeding, scape removal and harvesting). If you are planting multiple rows, keep them spaced at 12-18 inches apart.
Step 3:
Space the cloves 4-6 inches apart in the trenches, keeping the pointy end of the clove pointing up.
Step 4:
Cover the cloves with soil and then add a 2 to 4 inch layer of mulch (Straw, shredded leaves and compost are all good options).
Harvesting Your Garlic
Garlic definitely teaches patience. It spends the entire winter quietly doing its thing underground while you’re wondering if anything is even happening. Thankfully, garlic is one of those crops that’s mostly happy to be left alone.
Here comes the hardest part of growing garlic! You cannot just pull the garlic out of the ground. The foliage is fragile and yanking on it will cause breaking, which will expose your long-awaited bulbs to potential disease and rotting. Garlic also bruises easily so handling them with care is very important to prevent rotting during storage.
Once the lower leave of the garlic stalk turns yellow, then brown and papery, this means it is go time for harvesting! Choose a test bulb and gently dig it out for a quick inspection. Cloves should be plump and papery tunics should be starting to form. If cloves still look tightly connected and aren’t separated, wait another week or two.
If everything looks good, take a garden fork and gently pry upward, then lift the bulb out by your hand. If you don’t have a large garden fork, a spade and some gardening gloves do the trick just fine! Be careful not to accidently pierce your bulbs though.
Curing the Bulbs
Now, I know you are excited about tasting you garlic, but here comes a crucial step in the growing process, and that is the curing of the garlic! You need to find a location (inside a dry shed, a covered porch, in you garage) to let the garlic hang out for about three weeks. They need to be laid in a single layer, preferably in a screen, rack or cloth covered table. Airflow is very important so the bulb skins become papery and the roots shrivel. Hard neck varieties will cure slower than soft neck garlic.
Now that they are cured, you can leave the roots and stems on or you can trim them for storage. You can trim stems to half an inch or braid soft-neck varieties for hanging storage. Braiding helps garlic last longer in storage due to better air circulation and saves space when stored. Don’t remove healthy skin; it is there for protection.
Enjoy!
Every fall, planting garlic feels like making a promise to my future self. I tuck those tiny cloves into the soil, cover them with mulch, and almost forget about them through the winter. Then summer rolls around, and suddenly I’m digging up basket after basket of fresh garlic that will flavor our meals for months. Few things in the garden offer such a big return for so little work. If you’ve been thinking about growing garlic, let this be the year you give it a try. I have a feeling you’ll be planting even more next fall.
Frequently Asked Questions
- Can I plant grocery store garlic?
Yes, you can grow grocery store garlic, but it comes with a few risks and is generally treated as a fun gardening experiment rather than a guaranteed harvest
- Why didn’t my garlic split into cloves?
There are a few explainations for this happening. It could be from late planting, you harvested too early, a lack of winter cold, or Since grocery store garlic rarely lists its specific variety, you may have unknowingly planted a tropical softneck variety or an elephant garlic variety.
- Can I grow garlic in containers?
Yes, you can absolutely grow garlic in containers quite successfully. Growing in pots is an excellent solution if you have limited garden space or heavy clay soil.
- What is a scape?
One of my favorite bonuses of growing hardneck garlic is the garlic scapes. They show up in early summer before the bulbs are ready, and they’re completely edible. Scapes are a long curly stem that is the most tender when it has taking one complete turn. We love tossing them into stir fry, making garlic scape pesto, or simply sautéing them in butter. It’s like getting a bonus harvest before the real harvest arrives.
- How long does garlic last after harvest?
Cured hardneck varieties last 6-9 months if stored properly
Cured softneck varieties can last 9 moths to a year
- What is garlic scape pesto?
Garlic scape pesto is a vibrant, flavorful twist on traditional pesto that replaces basil and raw garlic cloves with the curled, bright-green flower stalks of hardneck garlic plants.